Desi's Twirl Effect


For anyone who has ever used photoshop, you will certainly know that there are countless methods of process buried deep within the program. One of these fun and creative methods to use the program is to create the twirl effect with your images. While these tactics have been around for years, it is making a resurgence again in 2020.
Let's get started!
Things you will need:
1. Any image!
2. Photoshop
Please note, this process uses a lot of computing power. If you find computing limitations, you may want to reduce the consumption of your computer memory by reducing the image size/resolution.
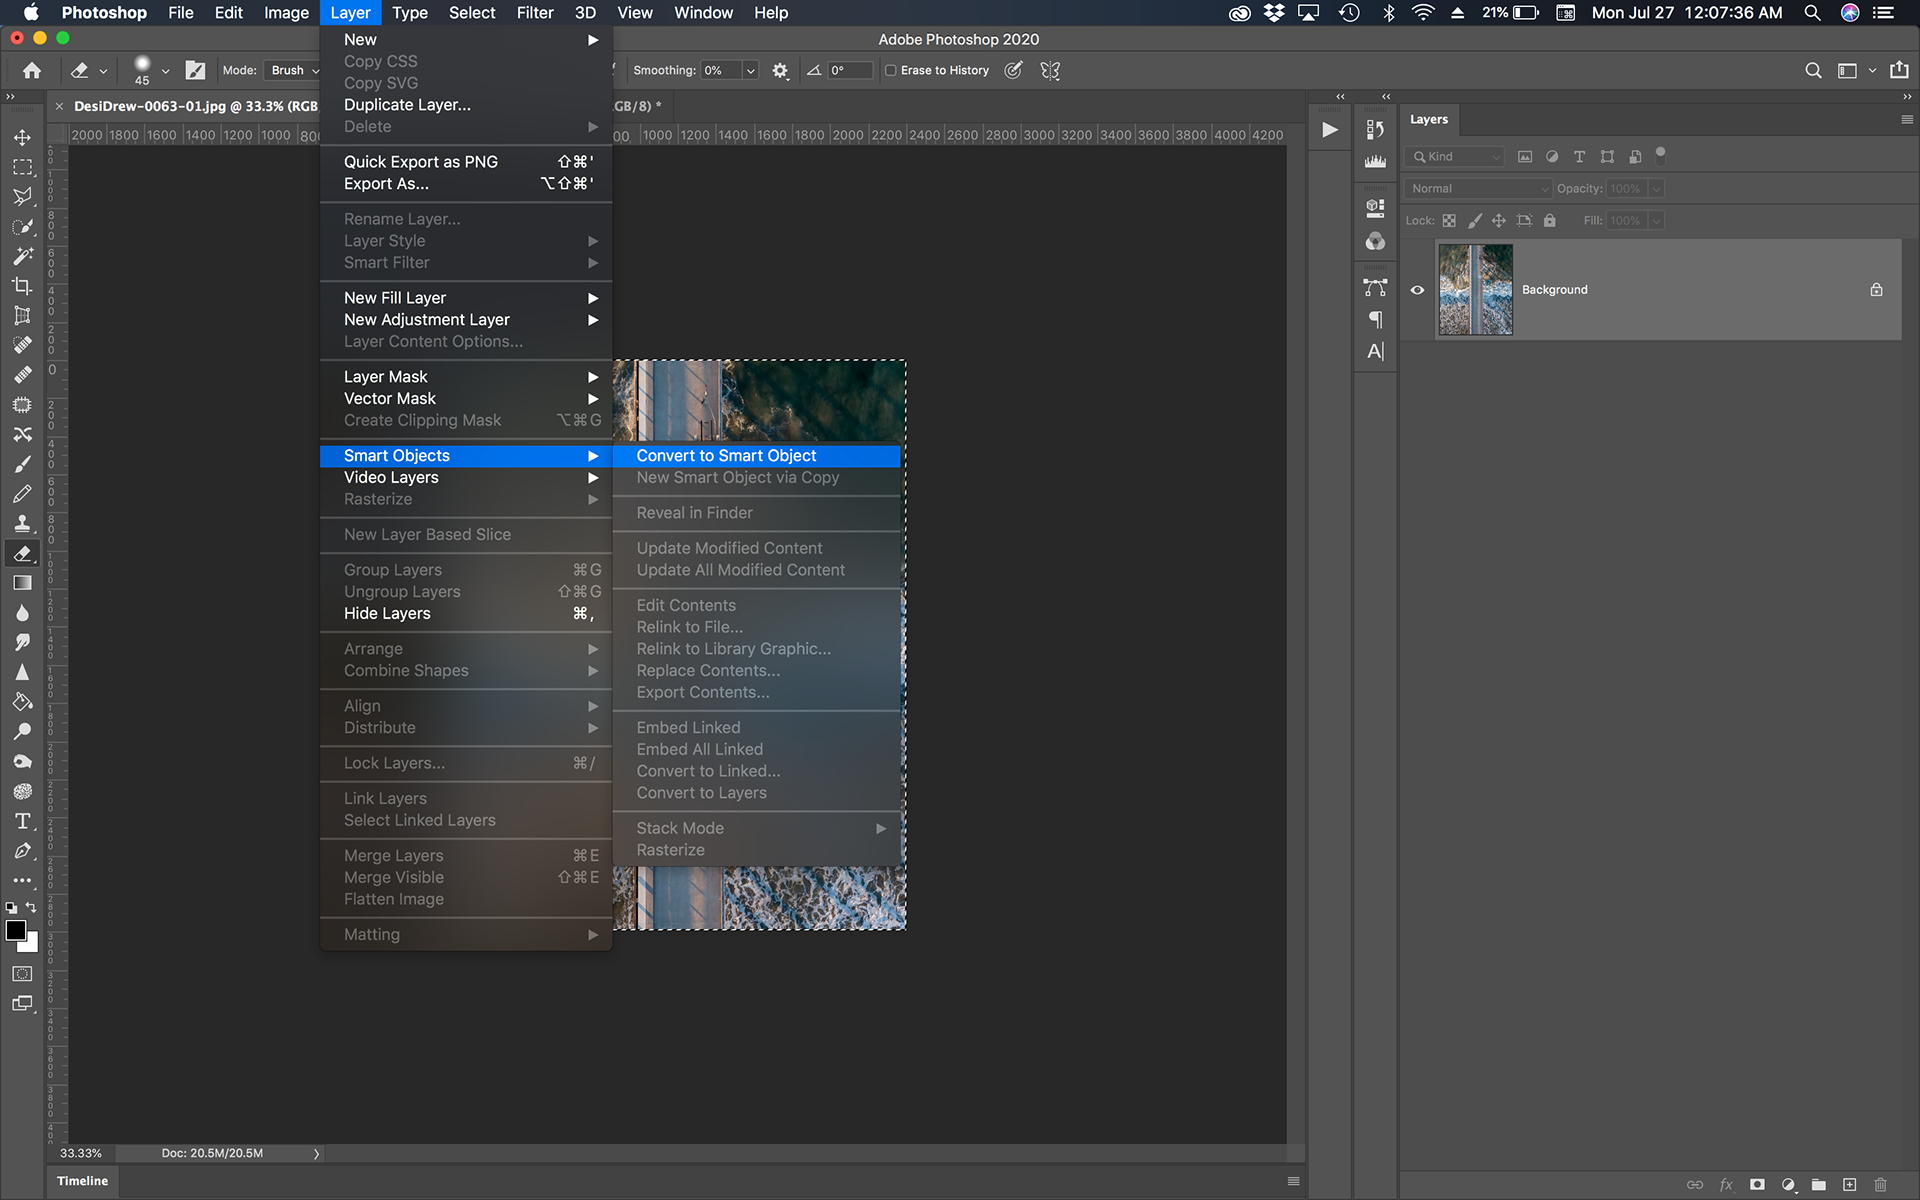
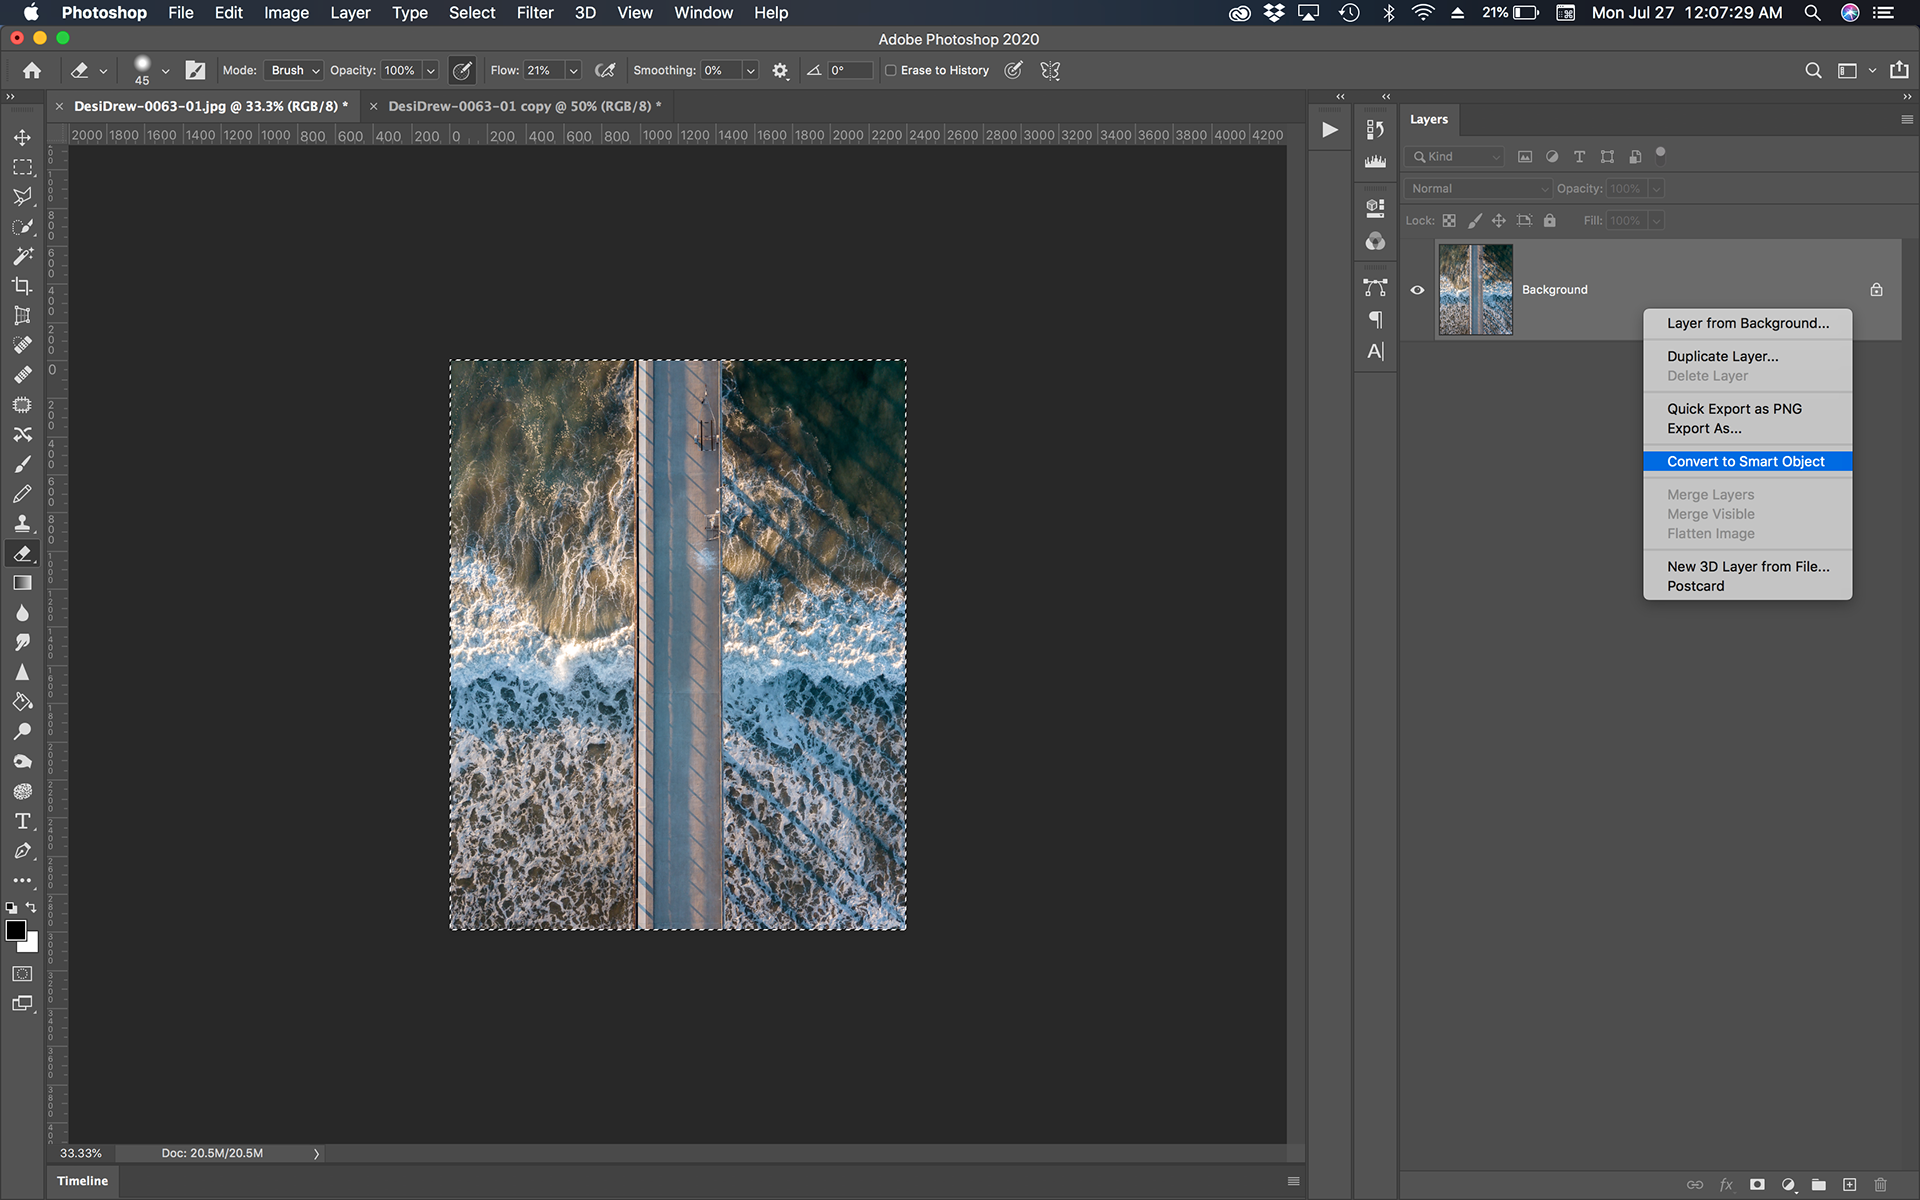
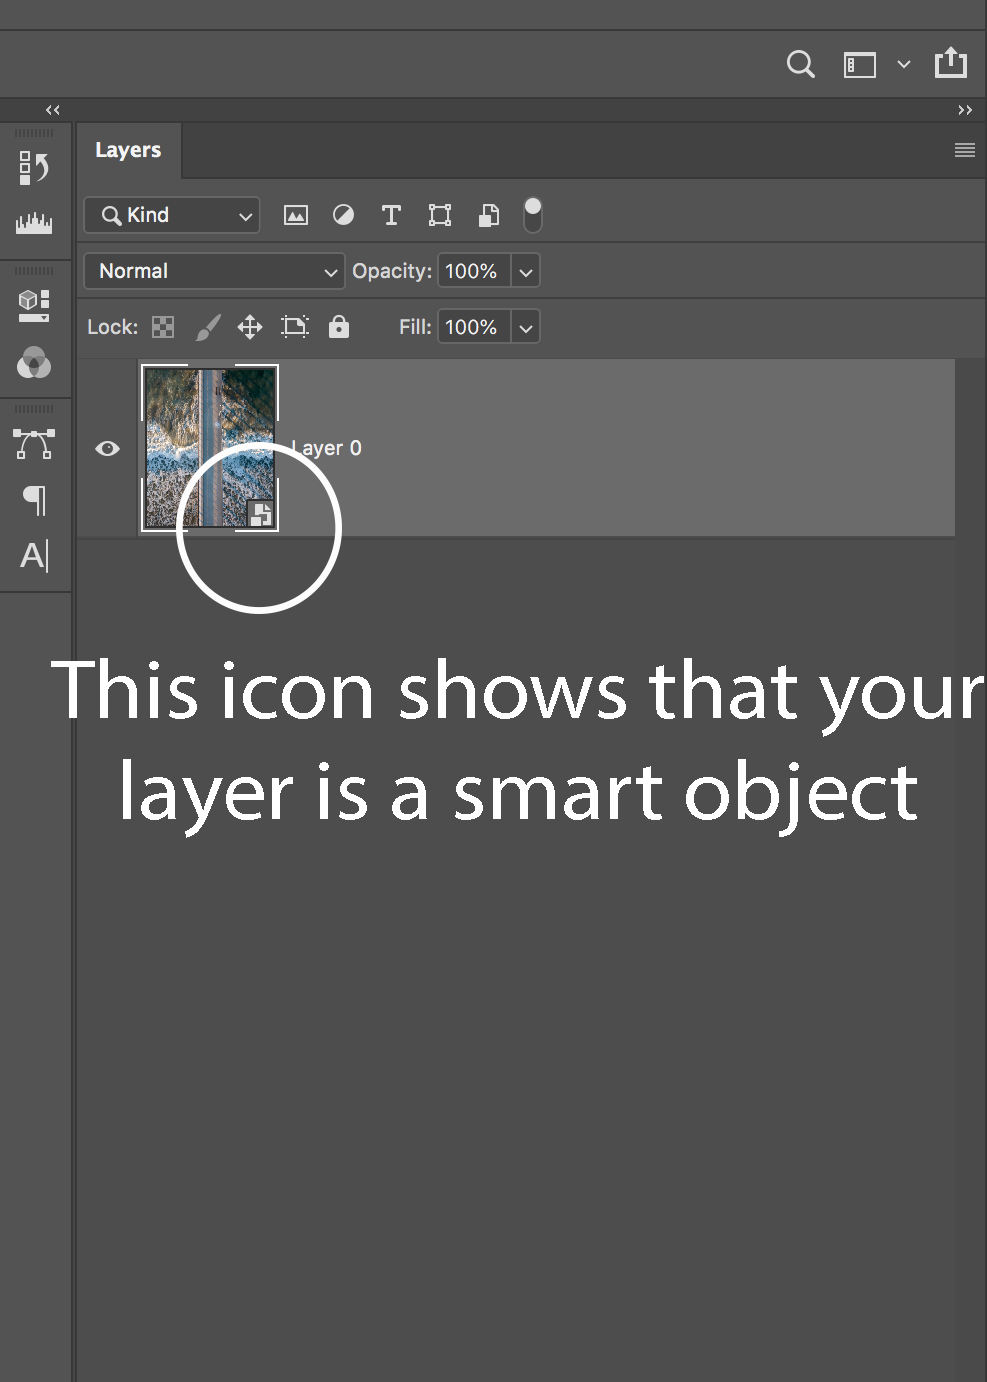
Step One: Convert your image to a smart object. Select Layer > Smart Objects > Convert to Smart Object or Right click the layer in the layers window and "Convert to Smart Object"
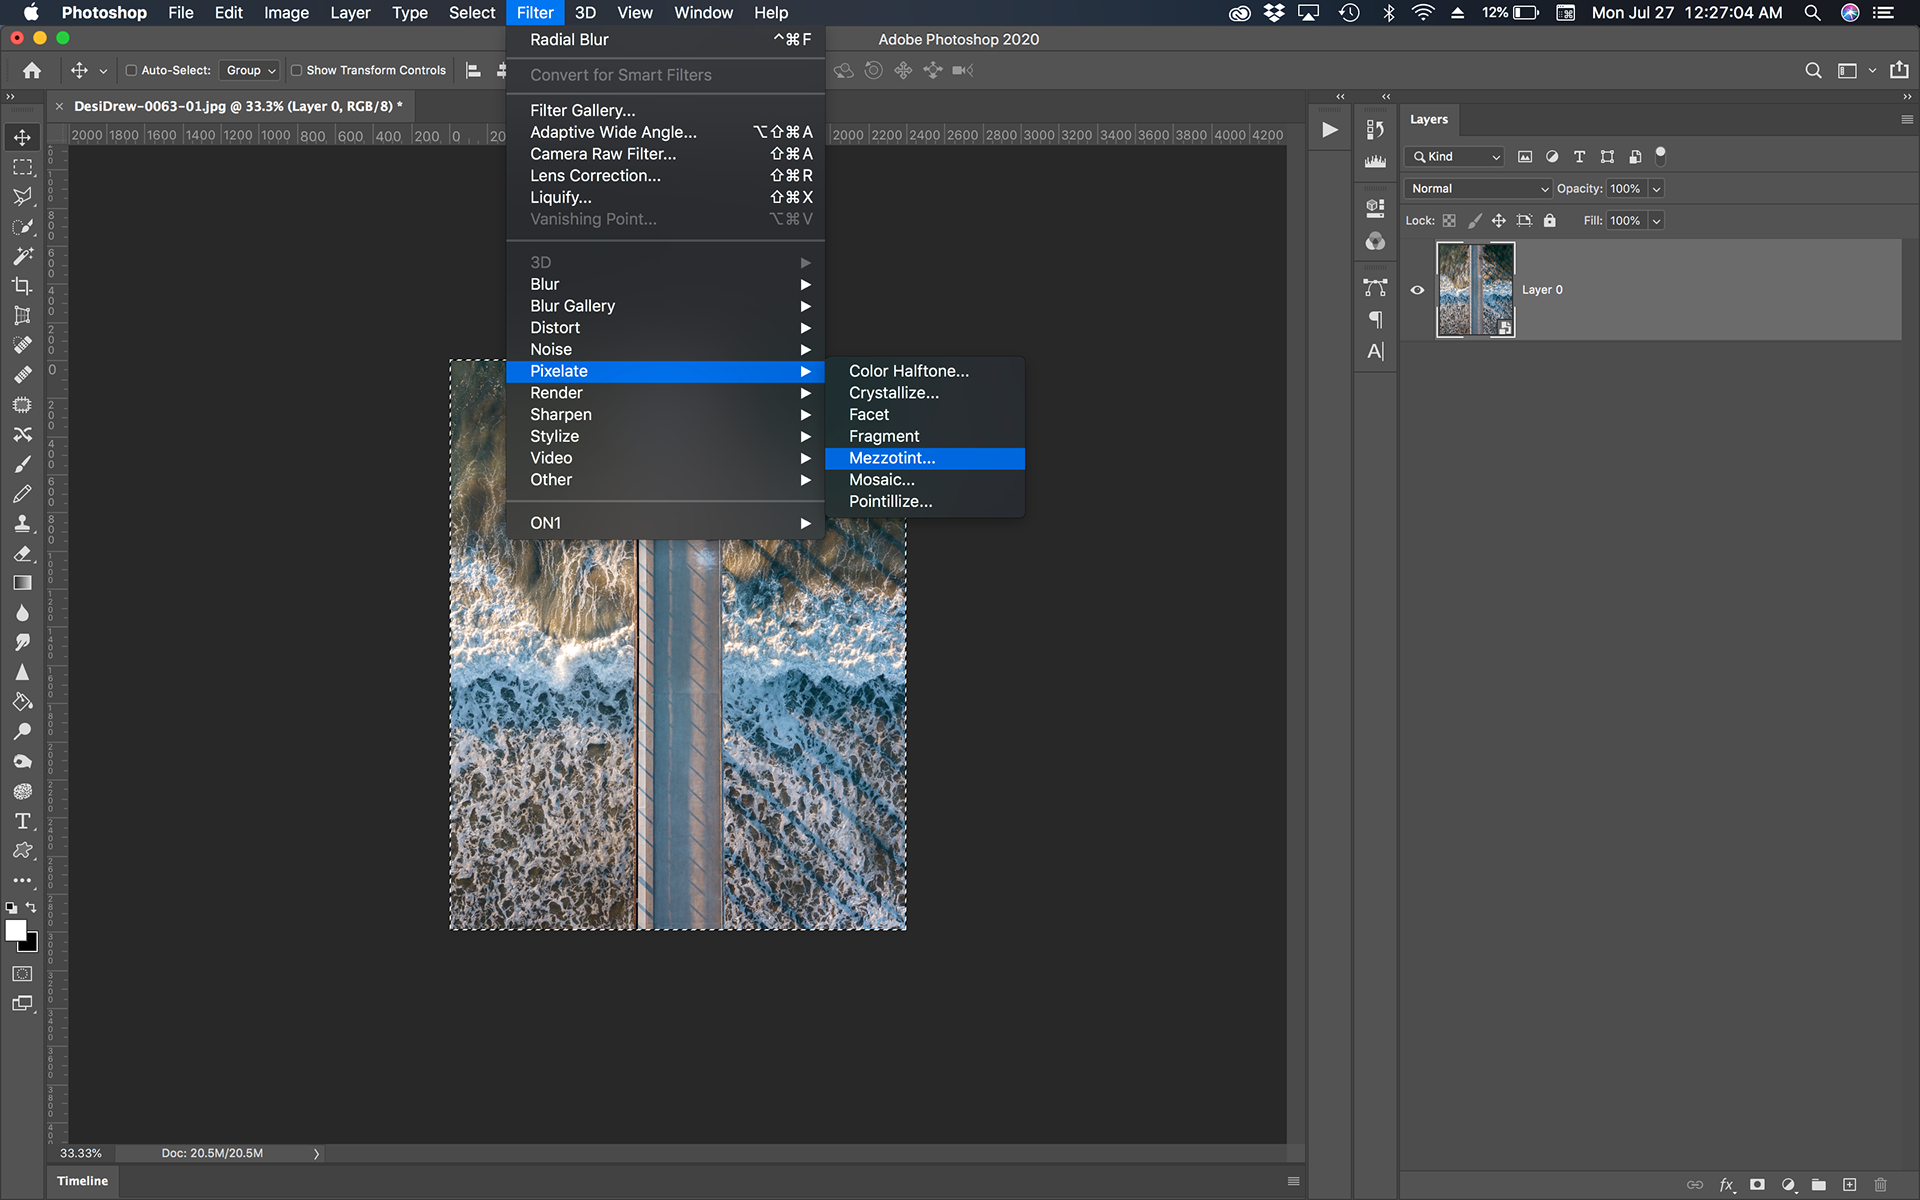
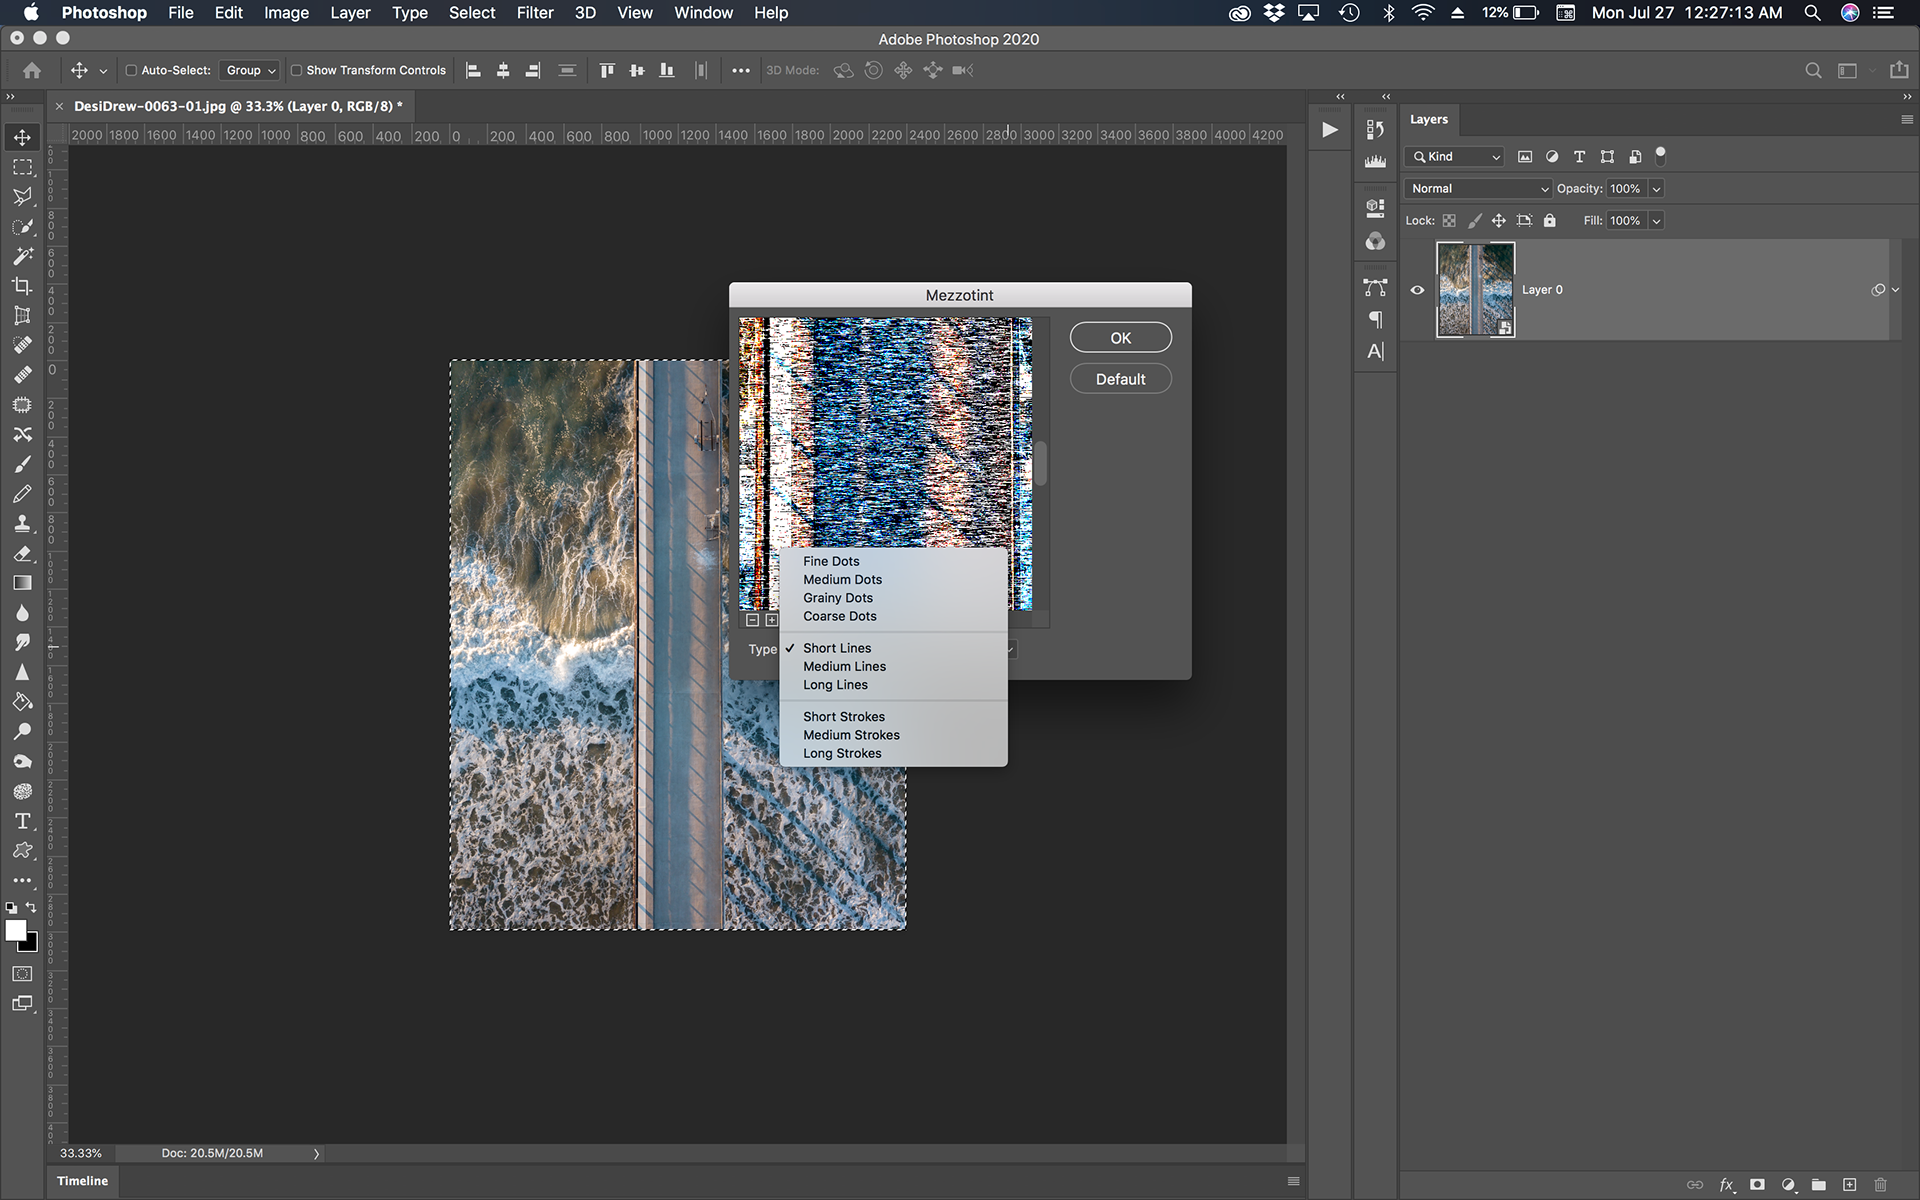
Step Two: Apply the Mezzotint filter. Select Filter > Pixelate > Mezzotint
You can select any type. Each Mezzotint filter will apply a different contrast in the final image however since we converted our image to a smart object we can change the type later without any issue.

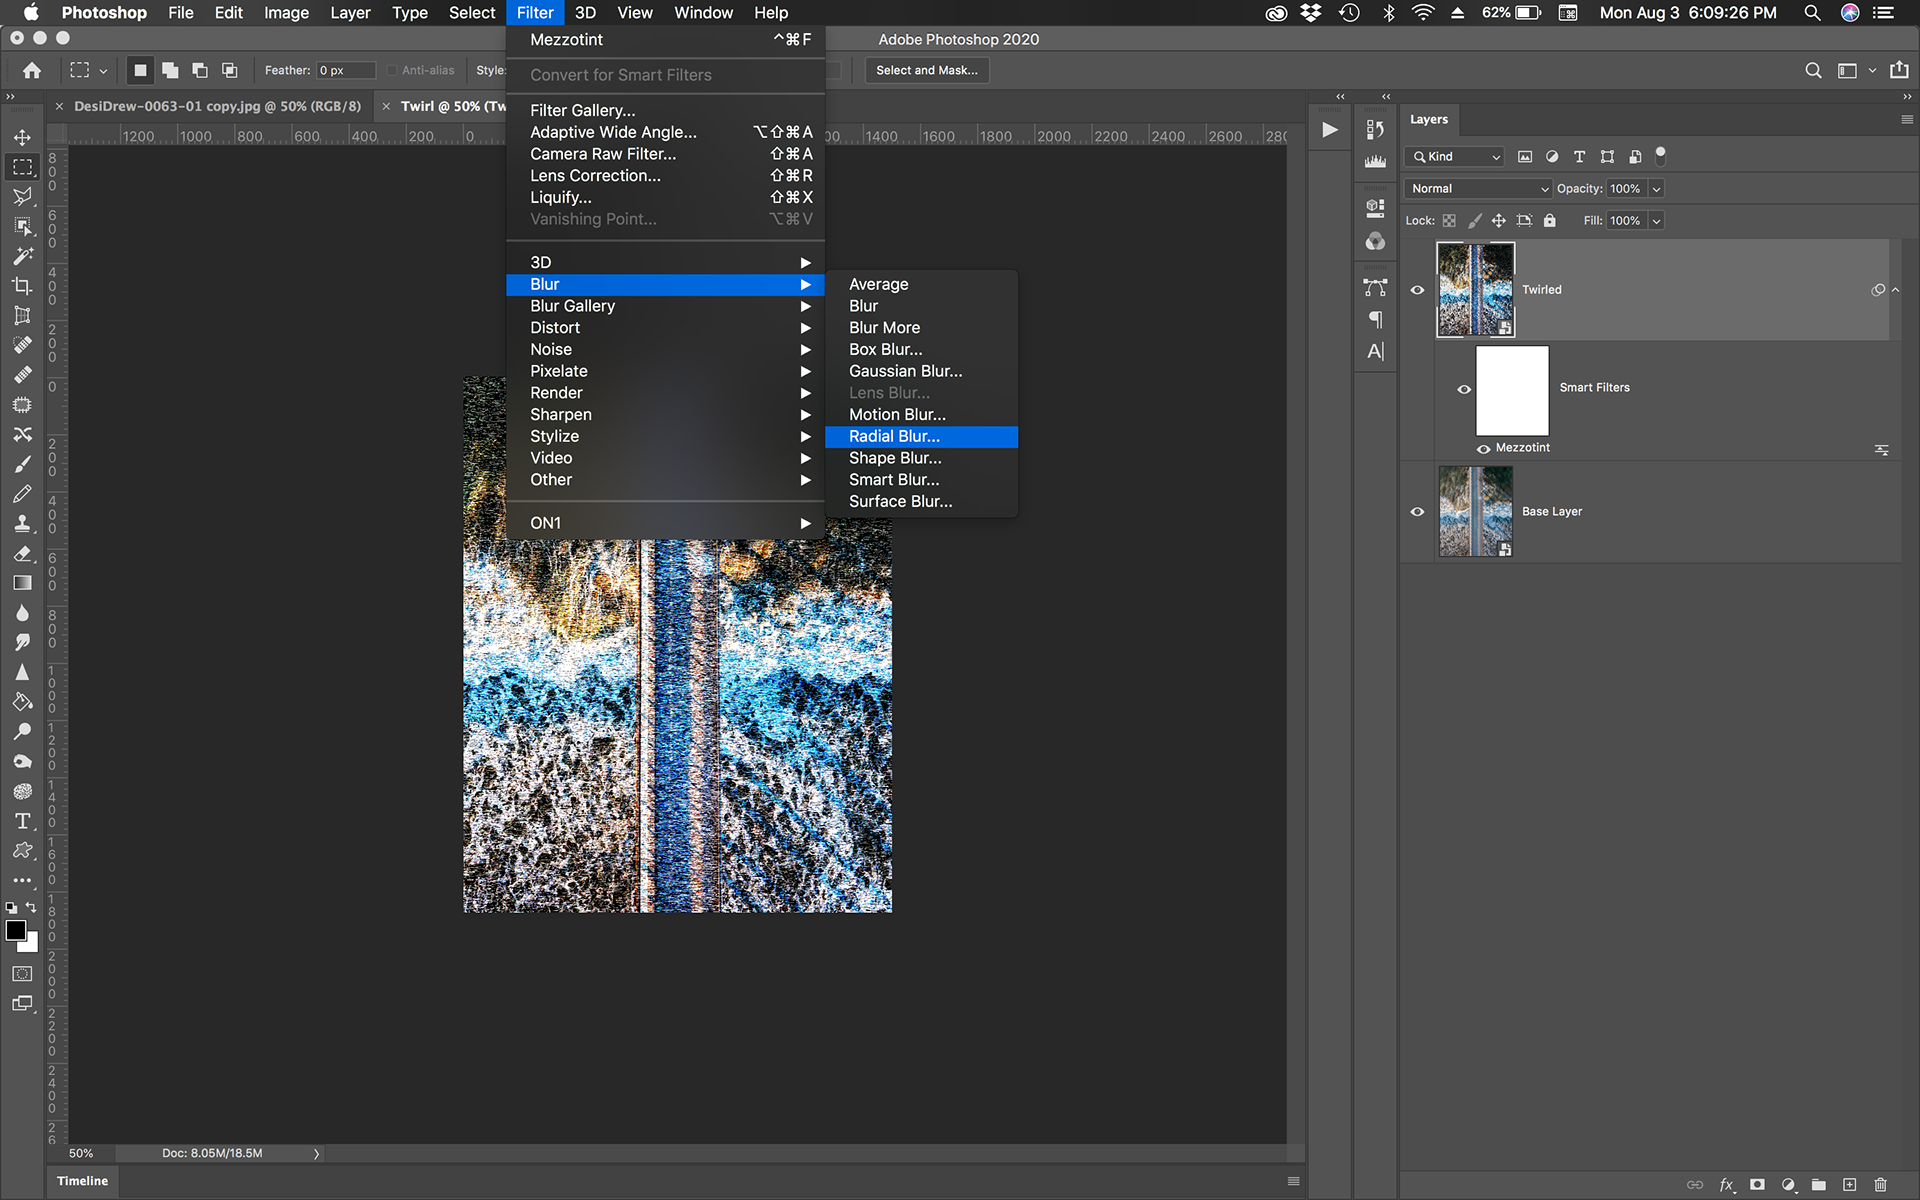
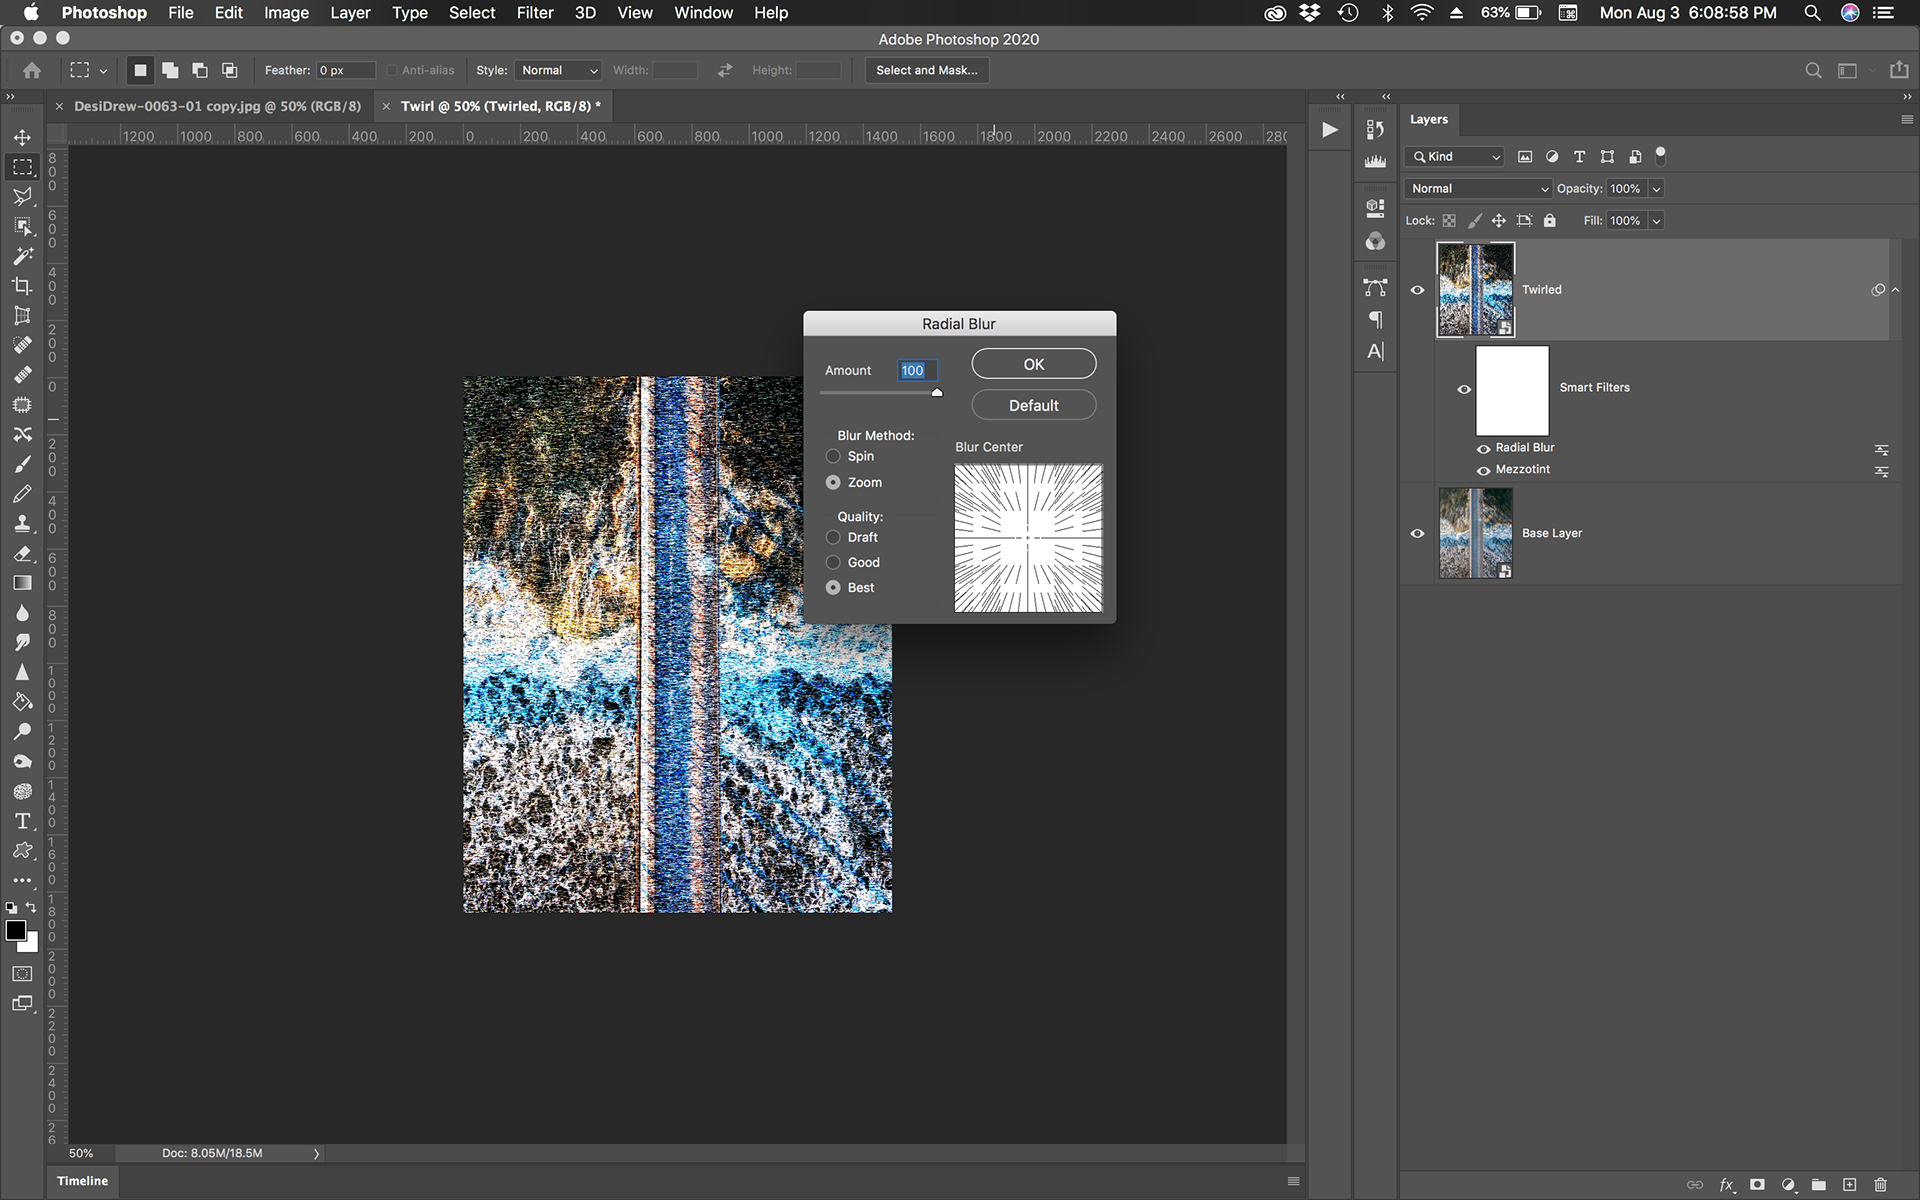
Step Three: We need to apply a radial blur to create the silky smooth lines for the image. Select Filter > Blue > Radial Blur
In the pop-up window we want: Amount: 100 Blur Method: Zoom Quality: Best
REPEAT THIS STEP TWO MORE TIMES
Compounding the three radial blur filters is very important to create a smooth effect. You can also use two for shorter lines
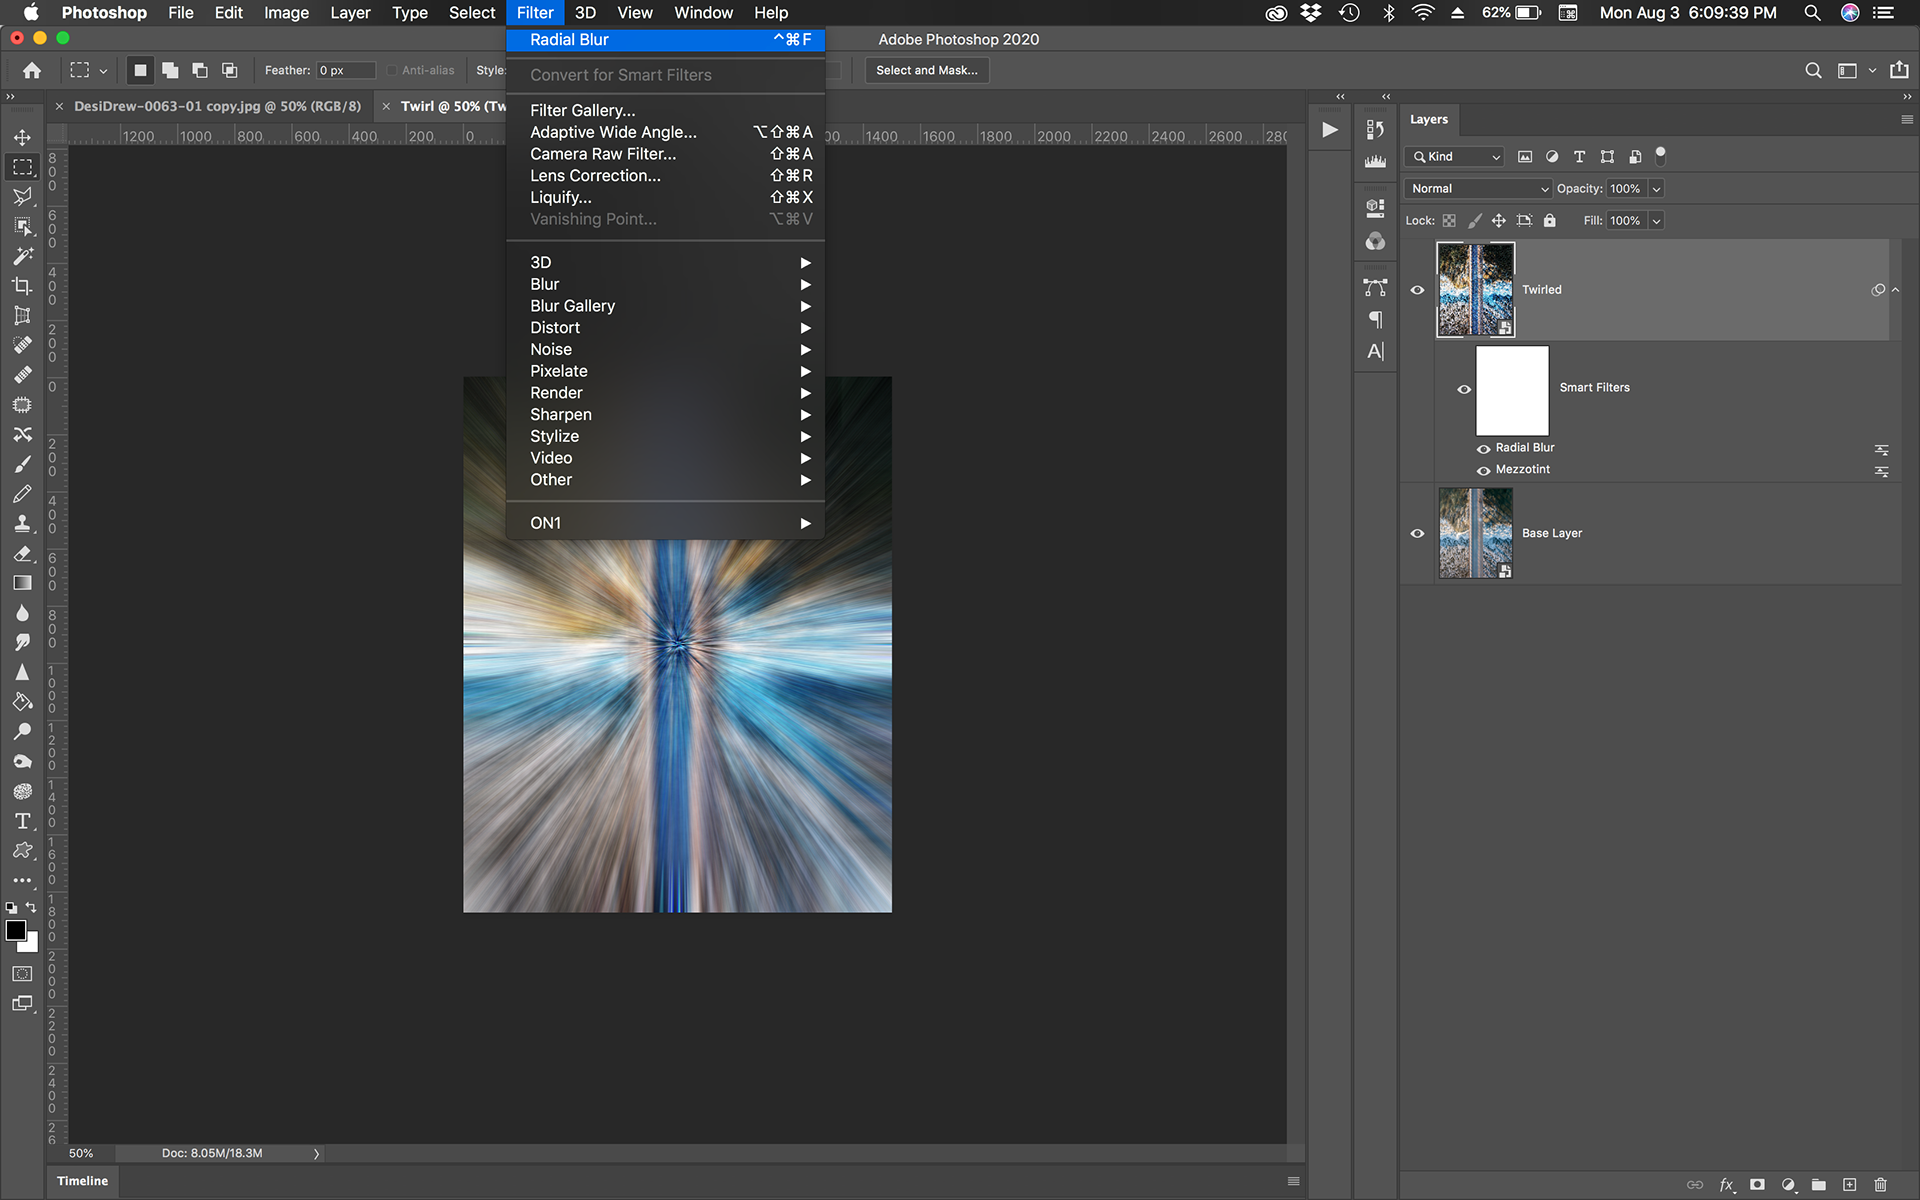
Repeat the last filter quicker by selecting "Filter"

You should see three layers of Radial Blur under your smart object
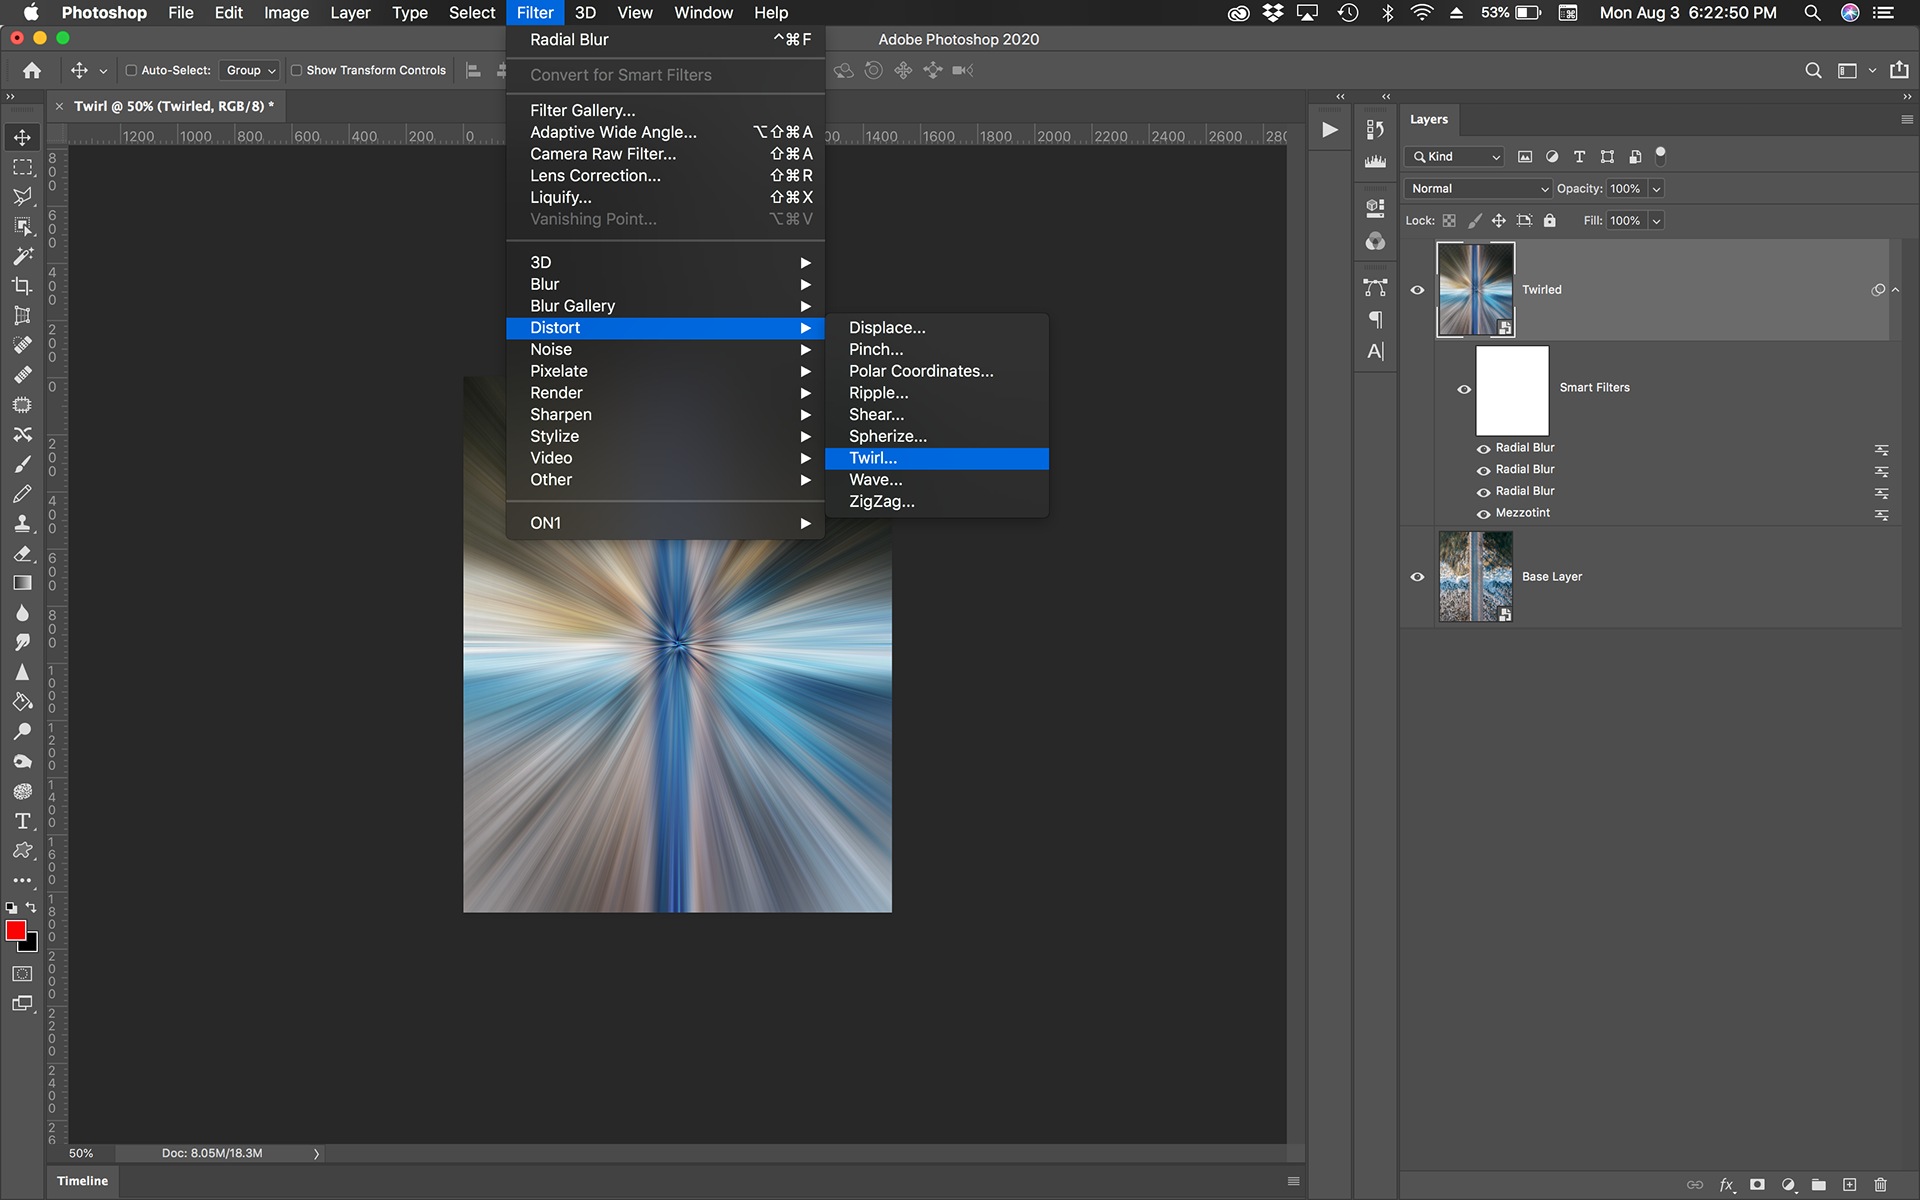
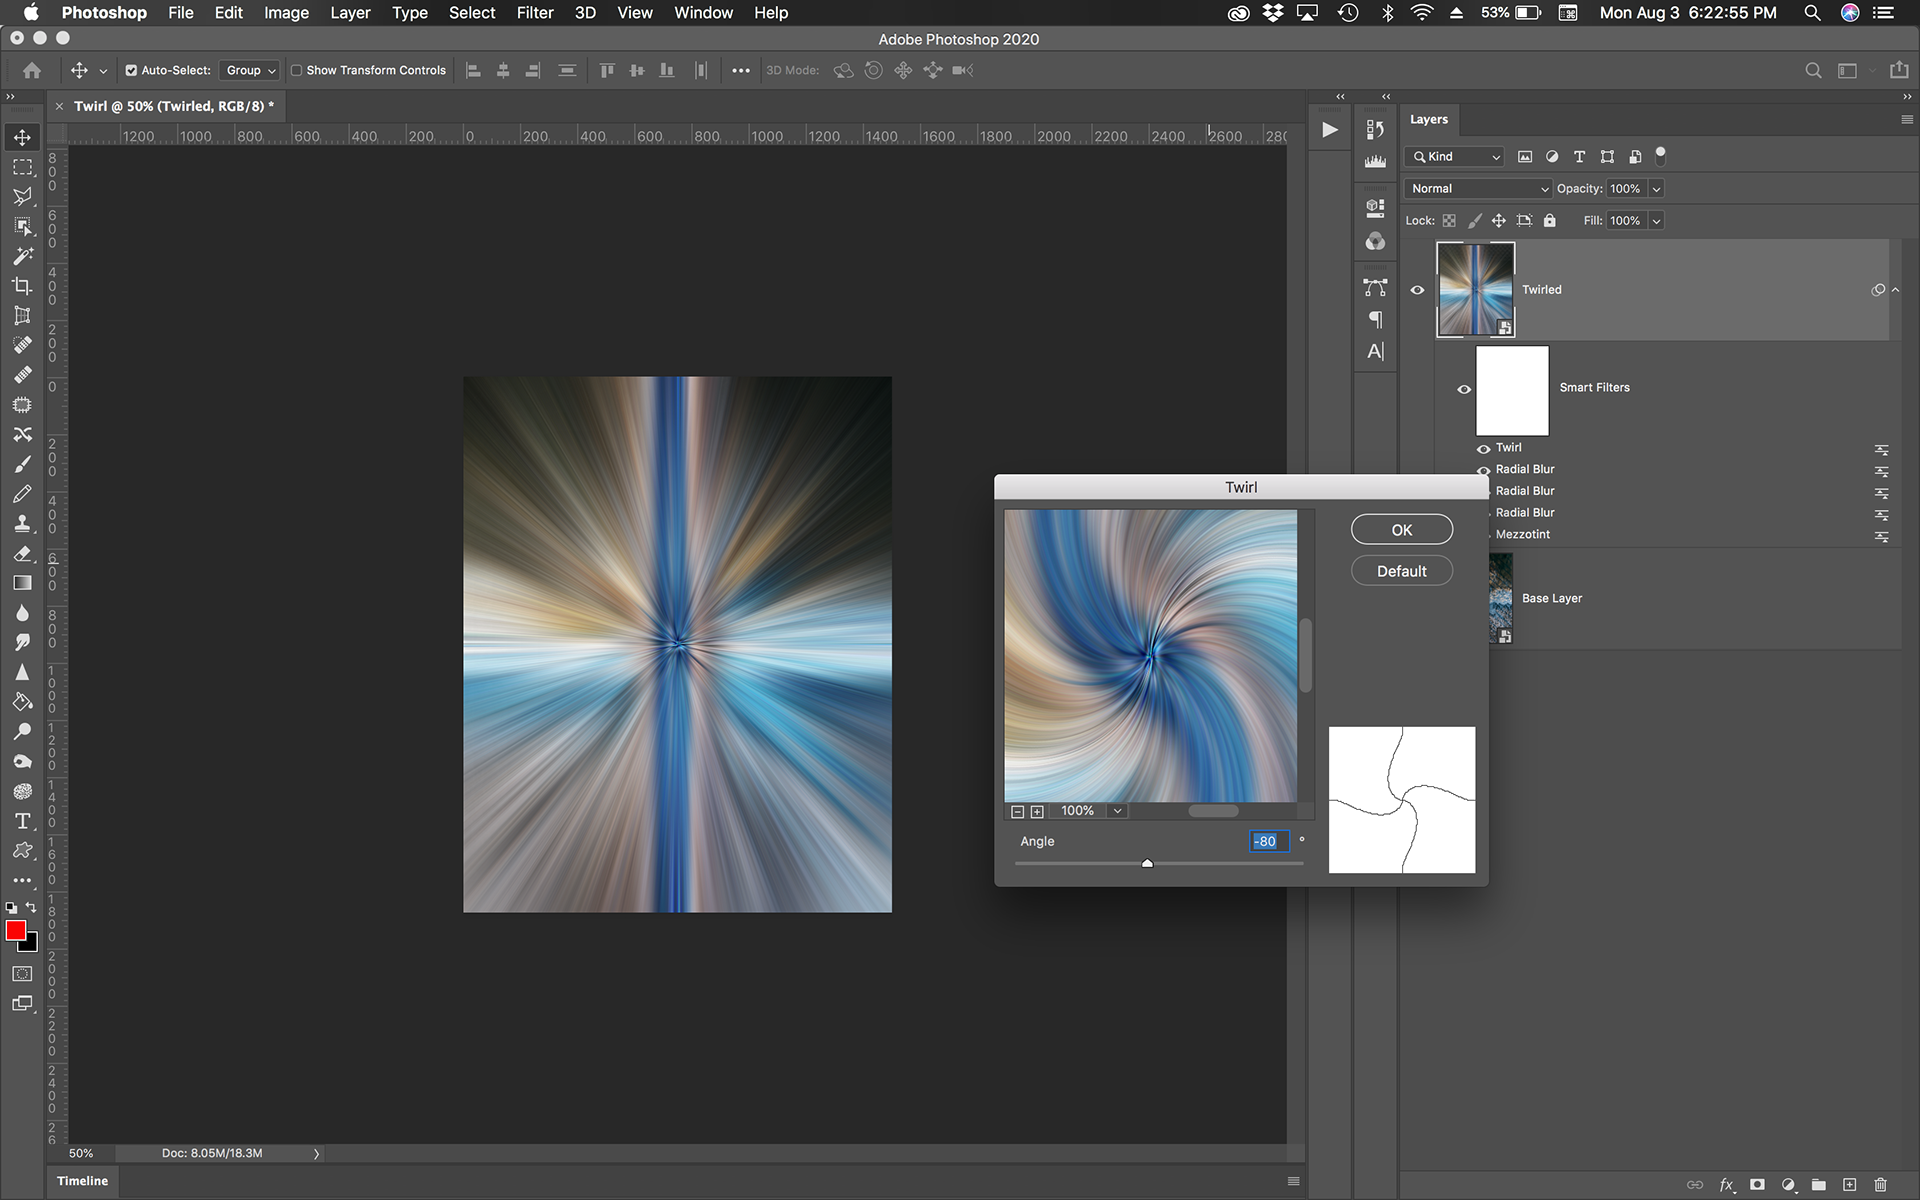
Step Four: Add the twirl effect. Select Filter > Distort > Twirl
For the angle you can any degree, however typically the range from 50 to 150 appear to work most often. This can be changed at a later time.
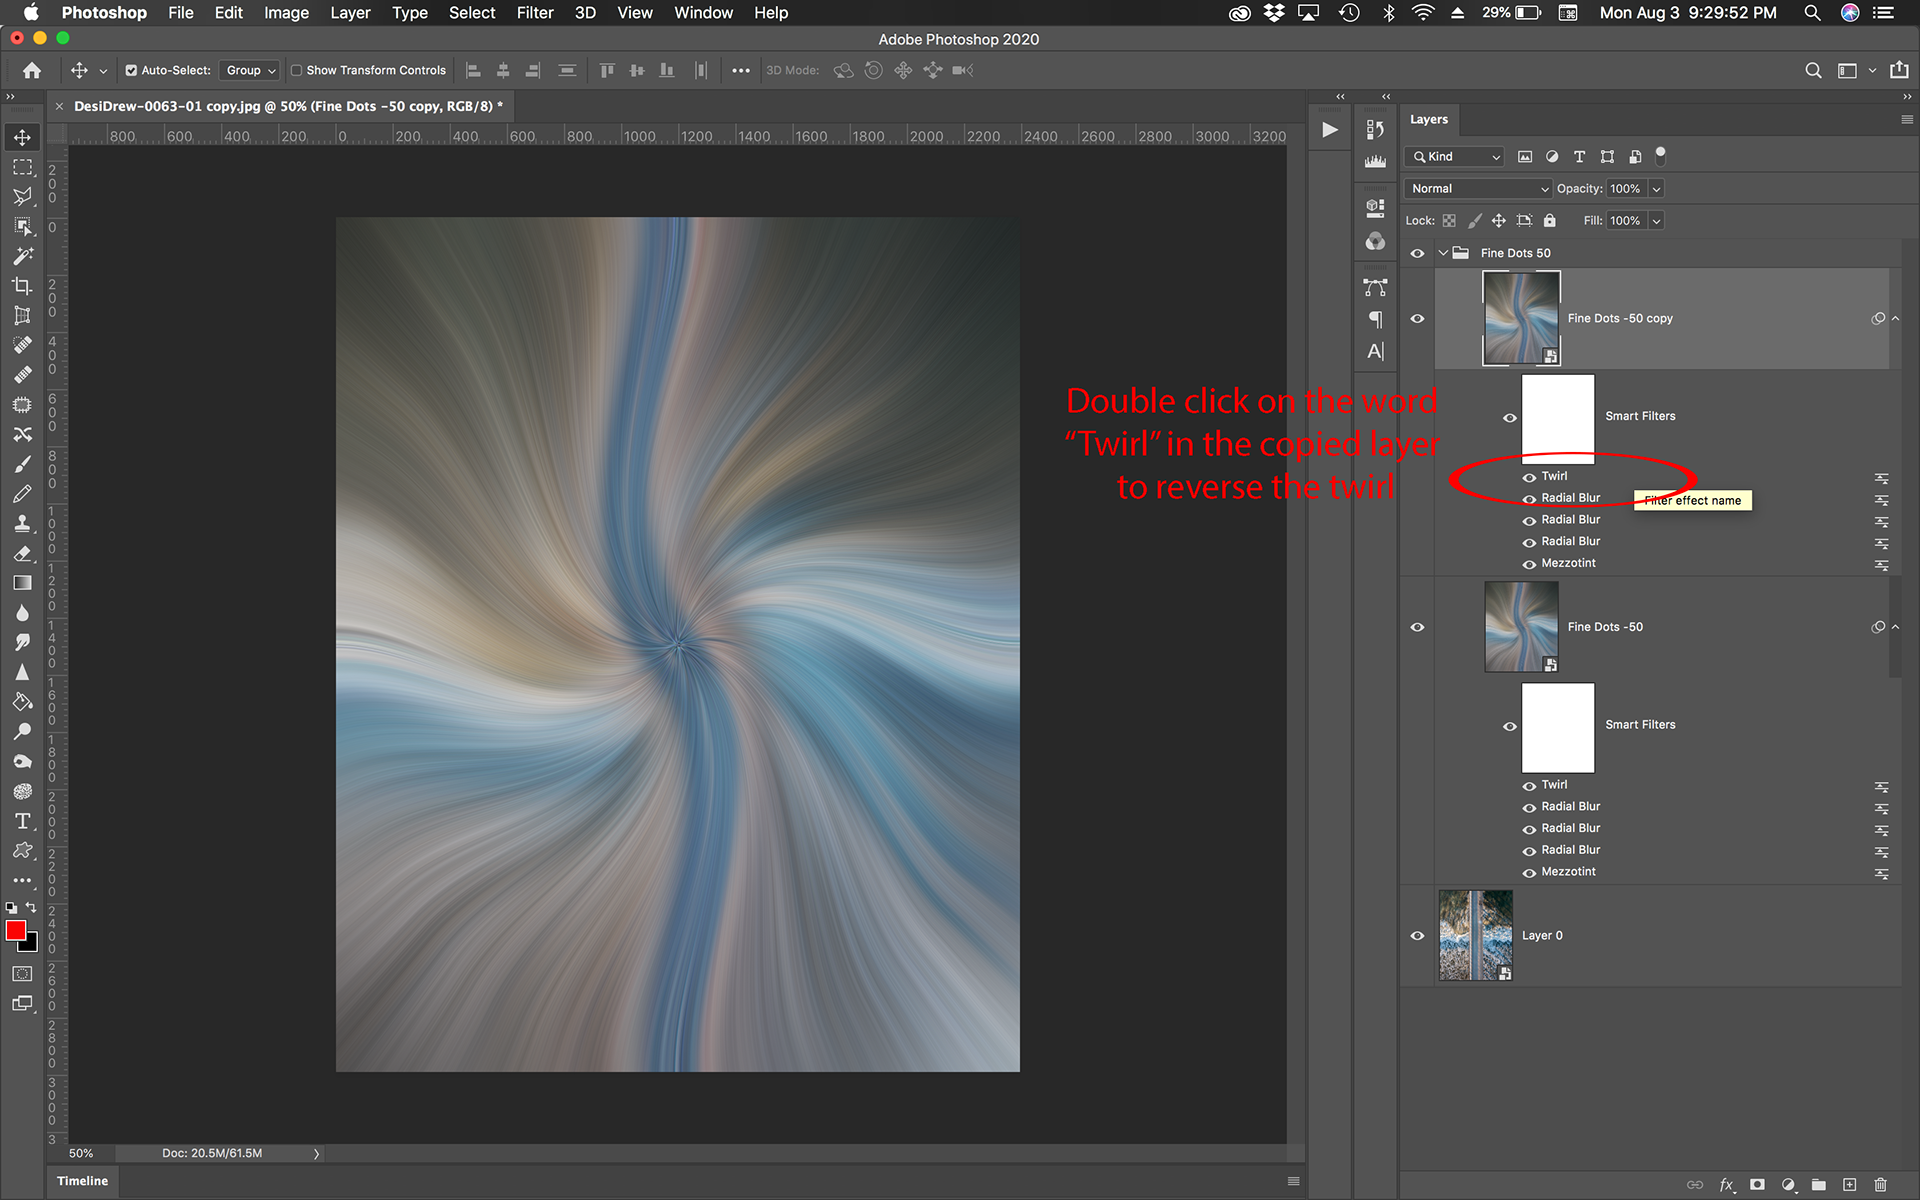
Step Five: Duplicate the layer Select Layer > Duplicate Layer. You can alternatively select the layer and press Command + J (MAC) Control + J (PC)
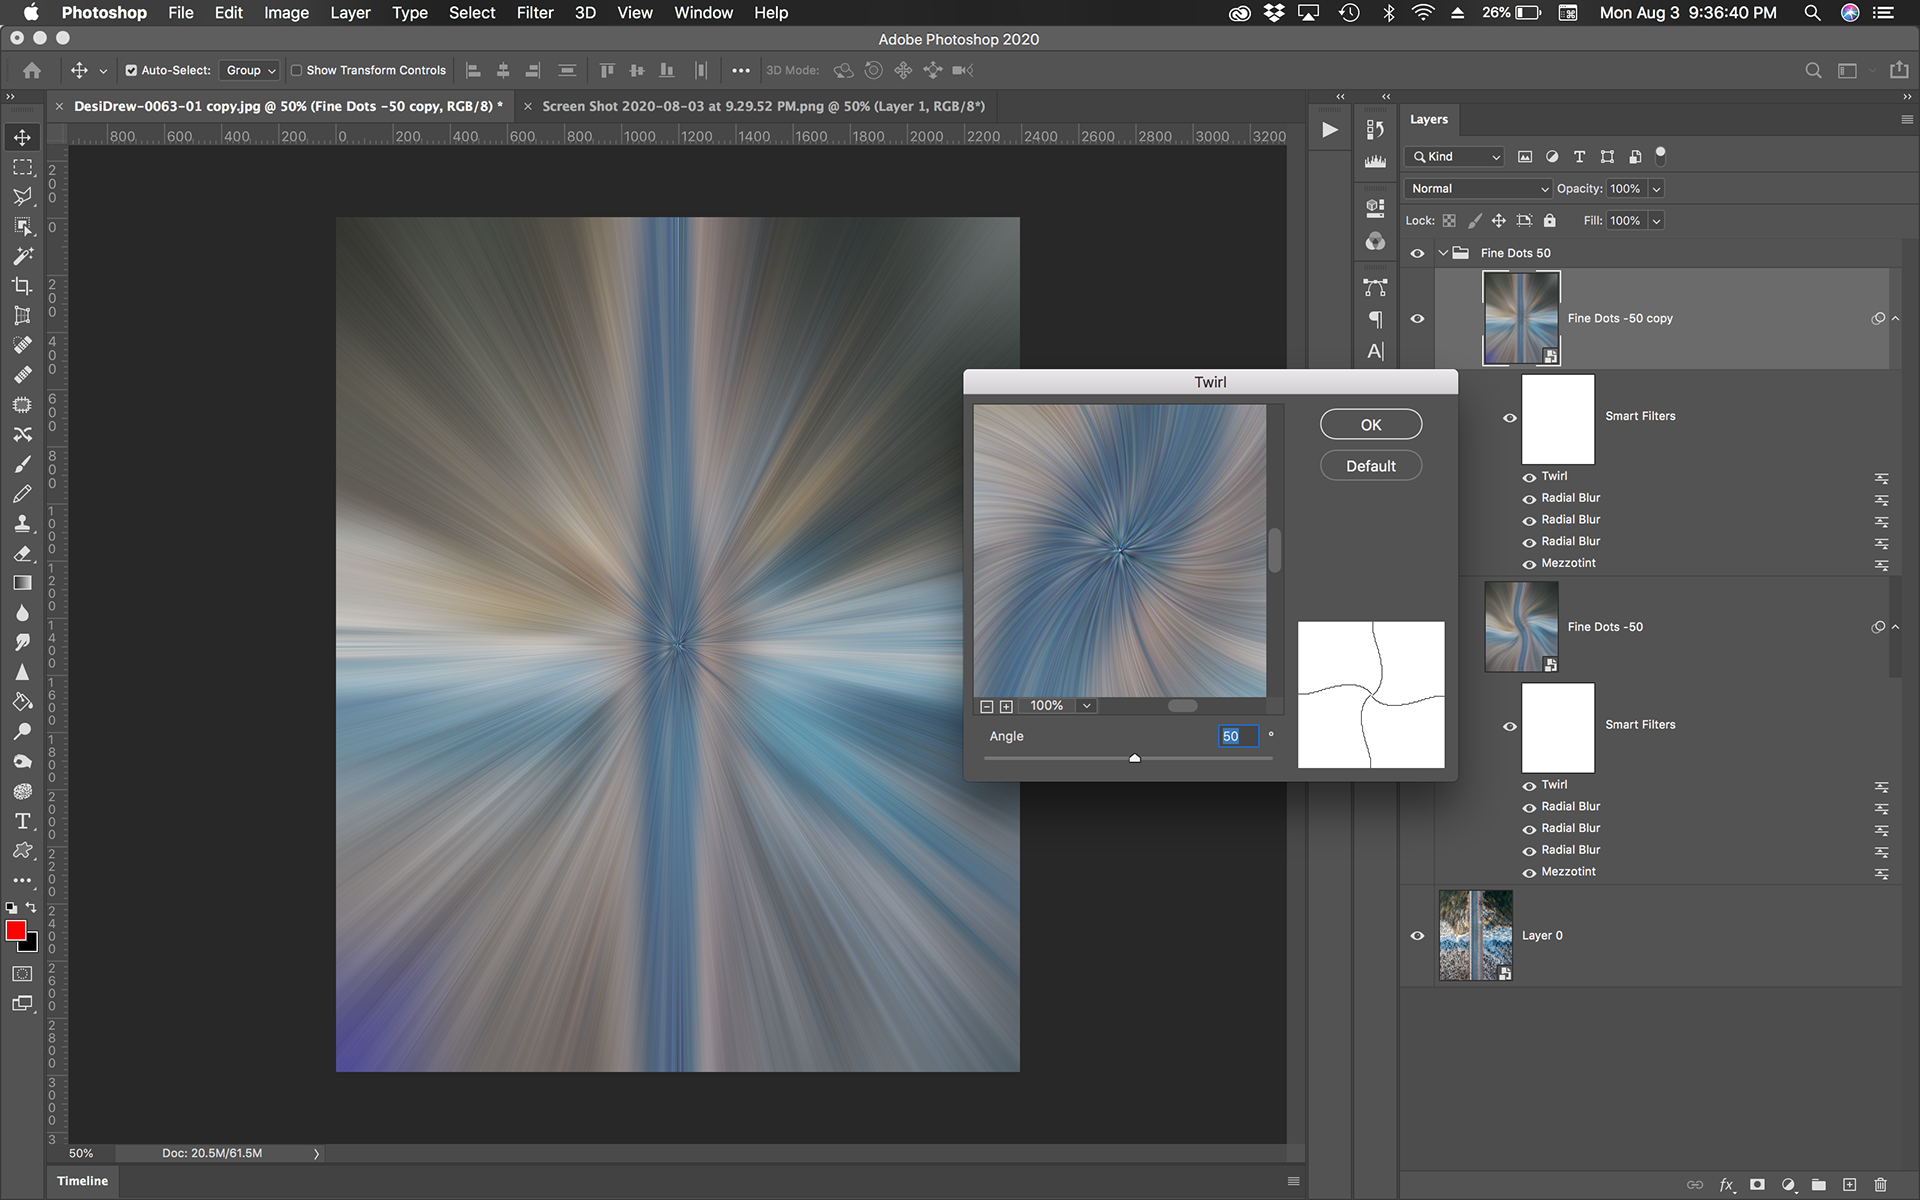
Once duplicated you will see the layer adjustments copied as well. In order to have the copied twirl adjustment counter twirl, we need to double click the filter adjustment "Twirl". Once the dialog box appears, you can input a counter twirl using a negative input. You can add either a direct opposite of your original input number or you can use an alternate number for a non-symmetrical twirl
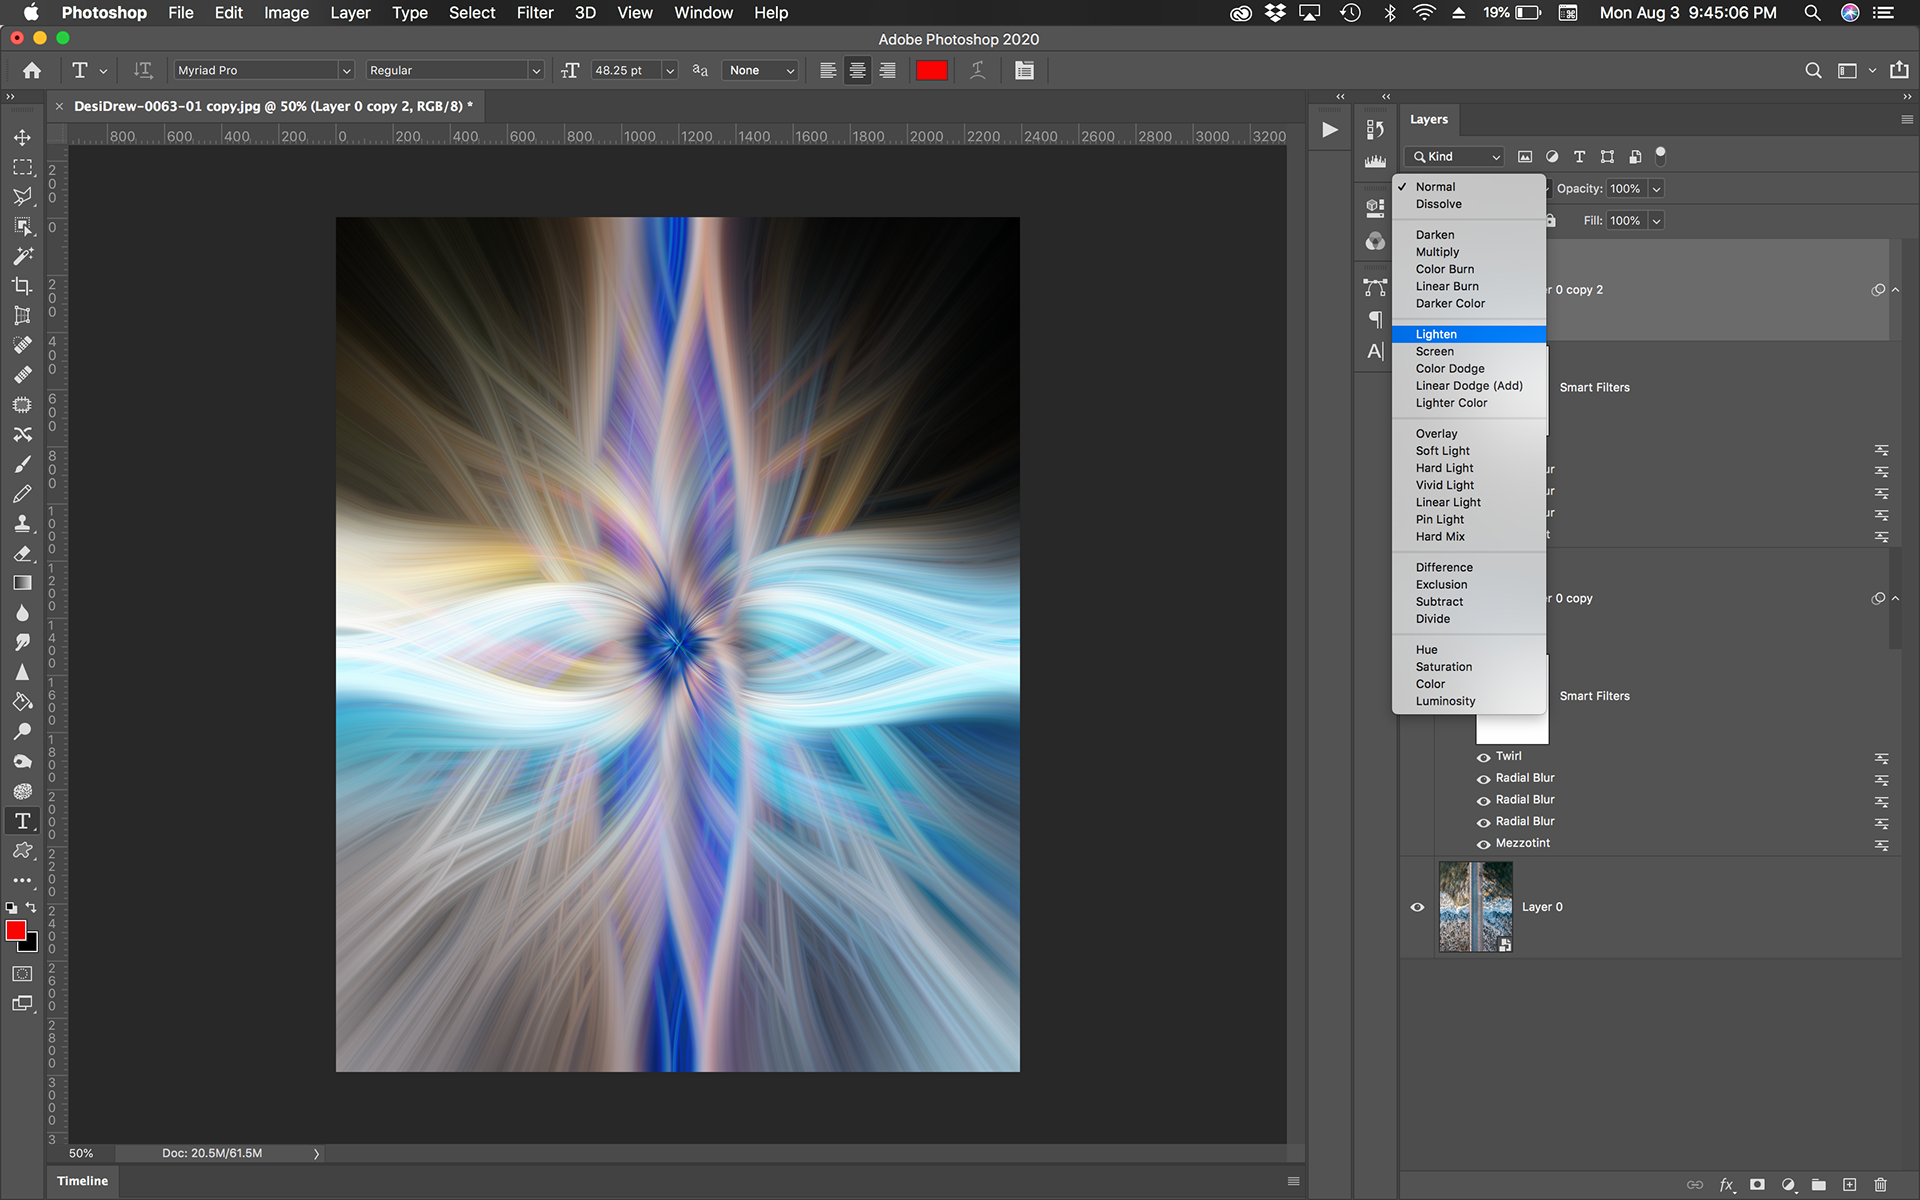
Step Six: Apply a blend mode to the duplicate layer. While the blend mode is based on preference, "Lighten" and "Darken" typically show best.
At this point you can make layer adjustments to the image as well as you can manipulate the various smart filters (mezzotint and twirl) that we made. There are endless combinations of type of mezzotint and twirl degree.